安装/升级next主题
安装
1 | git clone https://github.com/theme-next/hexo-theme-next themes/next |
升级
1 | git clone https://github.com/theme-next/hexo-theme-next themes/next-reloaded |
在 Hexo 的主配置文件中设置主题:
1 | ... |
更新语言配置
从 v6.0.3 版本起,zh-Hans 改名为
zh-CN:https://github.com/theme-next/hexo-theme-next/releases/tag/v6.0.3
需要修改 Hexo 主配置文件 _config.yml 里的
language 配置
设置主题的Scheme
Next自带了几种外观,在主题目录下的_config.yml里找到scheme,我比较喜欢Mist:
1 | #scheme: Muse |
菜单设置
在主题目录下的_config.yml里找到menu:
1 | menu: |
新添加的菜单需要翻译对应的中文
打开
hexo/theme/next/languages/zh-CN.yml,在menu下自定义,如:1
2menu:
resources: 资源hexo new page "categories"此时在根目录的
source文件夹下会生成一个categories文件,文件中有一个index.md文件,修改内容如下1
2
3
4
5
6---
title: 分类
date: 2017-12-14 13:05:38
type: "categories"
comments: false
---
设定站点建立时间
在主题目录下的_config.yml里找到since:
1 | footer: |
设置头像
在主题目录下的_config.yml里找到avatar:
1 | # Sidebar Avatar |
注意:图片地址在./themes/next-reloaded/source/images/下
网站图标设置
下载16x16以及32x32大小的PNG格式图标,置于/themes/next/source/images/下
在主题目录下的_config.yml里找到favicon:
1 | favicon: |
文章底部标签显示的优化
修改/themes/next/layout/_macro/post.swig,搜索
rel="tag">#,将 # 换成
<i class="fa fa-tag"></i>
主页文章添加阴影效果
现在使用自定义CSS的办法:
在主题目录下的_config.yml或next.yml中,设置
1 | custom_file_path: |
然后,将自定义CSS放进hexo/source/_data/styles.styl文件中即可
打开hexo/source/source/_data/styles.styl,添加以下代码:
1 | // 主页文章添加阴影效果 |
自动更换背景图片
https://www.jianshu.com/p/30bf702f533c
打开hexo/source/source/_data/styles.styl,添加以下代码:
1 | //页面背景 |
background:url为图片路径,也可以使用本地地址,如
/images/background.jpg,地址在
hexo/themes/next/source/images 下
background-repeat:若果背景图片不能全屏,那么是否平铺显示,充满屏幕
background-attachment:背景是否随着网页上下滚动而滚动,fixed为固定
background-size:图片展示大小,这里设置100%
100%的意义为:如果背景图片不能全屏,那么是否通过拉伸的方式将背景强制拉伸至全屏显示。
顶部加载条
修改主题配置文件,找到pace改为true,并从上面提供的样式中选择一种填入pace_theme中就可以了:
1 | # Progress bar in the top during page loading. |
浏览页面的时候显示当前浏览进度
打开 themes/next/_config.yml ,搜索关键字
scrollpercent ,把 false 改为
true。
1 | # Scroll percent label in b2t button |
如果想把 top按钮放在侧边栏,打开
themes/next/_config.yml ,搜索关键字 b2t ,把
false 改为 true。
1 | # Back to top in sidebar |
文章顶部显示更新时间(默认打开)
打开主题配置文件 _config.yml ,搜索关键字
updated_at 设置为 true :
1 | # Post meta display settings |
最新版本的next默认打开了这个选项
修改内容区域的宽度
我们用Next主题是发现在电脑上阅读文章时内容两边留的空白较多,这样在浏览代码块时经常要滚动滚动条才能阅读完整,体验不是很好,下面提供修改内容区域的宽度的方法。 NexT 对于内容的宽度的设定如下:
- 700px,当屏幕宽度 < 1600px
- 900px,当屏幕宽度 >= 1600px
- 移动设备下,宽度自适应
如果你需要修改内容的宽度,同样需要编辑样式文件。 在Mist和Muse风格可以用下面的方法:
编辑主题的 source/css/_variables/base.styl
文件,新增变量:
1 | // 修改成你期望的宽度 |
当你使用Pisces风格时可以用下面的方法:
1 | header{ width: 90%; } |
如何设置「阅读全文」?
在首页显示一篇文章的部分内容,并提供一个链接跳转到全文页面是一个常见的需求。 NexT 提供三种方式来控制文章在首页的显示方式。 也就是说,在首页显示文章的摘录并显示 阅读全文 按钮,可以通过以下方法:
在文章中使用
<!-- more -->手动进行截断,Hexo 提供的方式 推荐在文章的 front-matter 中添加
description,并提供文章摘录自动形成摘要,在 主题配置文件 中添加:
1
2
3auto_excerpt:
enable: true
length: 150默认截取的长度为
150字符,可以根据需要自行设定
建议使用
<!-- more -->(即第一种方式),除了可以精确控制需要显示的摘录内容以外,
这种方式也可以让 Hexo 中的插件更好的识别。
404 页面
使用方法,新建 404.html 页面,放到主题的 source
目录下,内容如下:
1 |
|
注意:本地测试没有效果,需要发布
博客压缩
gulp 压缩
参考:
https://zhuanlan.zhihu.com/p/28447279
https://leaferx.online/2017/06/16/use-gulp-to-minimize/
-
代码框设置
打开主题配置文件 _config.yml , 搜索关键字
codeblock
1 | codeblock: |
PAJX
该项功能的作用是:跳转到同网站另一个页面的时候,前后两个页面相同的元素不再重复加载,进而节省了加载的时间,加快访问速度。该项功能依赖官方提供的 PJAX 插件。
1 | # Easily enable fast Ajax navigation on your website. |
图片加载
实现该功能的基础是在文章中插入图片。该项功能的效果是:点击文中插图,图片能够放大,有幻灯片的效果。目前 NexT 提供了两款插件 fancybox 和 mediumzoom,两款插件开启一个即可。两款插件的效果不同,各有各的特点,我推荐使用 mediumzoom。
1 | # FancyBox is a tool that offers a nice and elegant way to add zooming functionality for images. |
PS: 本地图片无法加载问题
reference: https://blog.csdn.net/xjm850552586/article/details/84101345
段落标题添加锚点
使用 NexT 官方制作的一个锚点插件:hexo-theme-next-anchor。
1 | npm install hexo-theme-next-anchor --save |
在主题的配置文件 _config.yml 中添加:
1 | anchor: |
鼠标点击浮出爱心效果
Reference:https://tding.top/archives/58cff12b.html
在 themes/next/source/js/ 目录下新建文件:clicklove.js,填入如下内容:
1 | !function(e,t,a){function n(){c(".heart{width: 10px;height: 10px;position: fixed;background: #f00;transform: rotate(45deg);-webkit-transform: rotate(45deg);-moz-transform: rotate(45deg);}.heart:after,.heart:before{content: '';width: inherit;height: inherit;background: inherit;border-radius: 50%;-webkit-border-radius: 50%;-moz-border-radius: 50%;position: fixed;}.heart:after{top: -5px;}.heart:before{left: -5px;}"),o(),r()}function r(){for(var e=0;e<d.length;e++)d[e].alpha<=0?(t.body.removeChild(d[e].el),d.splice(e,1)):(d[e].y--,d[e].scale+=.004,d[e].alpha-=.013,d[e].el.style.cssText="left:"+d[e].x+"px;top:"+d[e].y+"px;opacity:"+d[e].alpha+";transform:scale("+d[e].scale+","+d[e].scale+") rotate(45deg);background:"+d[e].color+";z-index:99999");requestAnimationFrame(r)}function o(){var t="function"==typeof e.onclick&&e.onclick;e.onclick=function(e){t&&t(),i(e)}}function i(e){var a=t.createElement("div");a.className="heart",d.push({el:a,x:e.clientX-5,y:e.clientY-5,scale:1,alpha:1,color:s()}),t.body.appendChild(a)}function c(e){var a=t.createElement("style");a.type="text/css";try{a.appendChild(t.createTextNode(e))}catch(t){a.styleSheet.cssText=e}t.getElementsByTagName("head")[0].appendChild(a)}function s(){return"rgb("+~~(255*Math.random())+","+~~(255*Math.random())+","+~~(255*Math.random())+")"}var d=[];e.requestAnimationFrame=function(){return e.requestAnimationFrame||e.webkitRequestAnimationFrame||e.mozRequestAnimationFrame||e.oRequestAnimationFrame||e.msRequestAnimationFrame||function(e){setTimeout(e,1e3/60)}}(),n()}(window,document); |
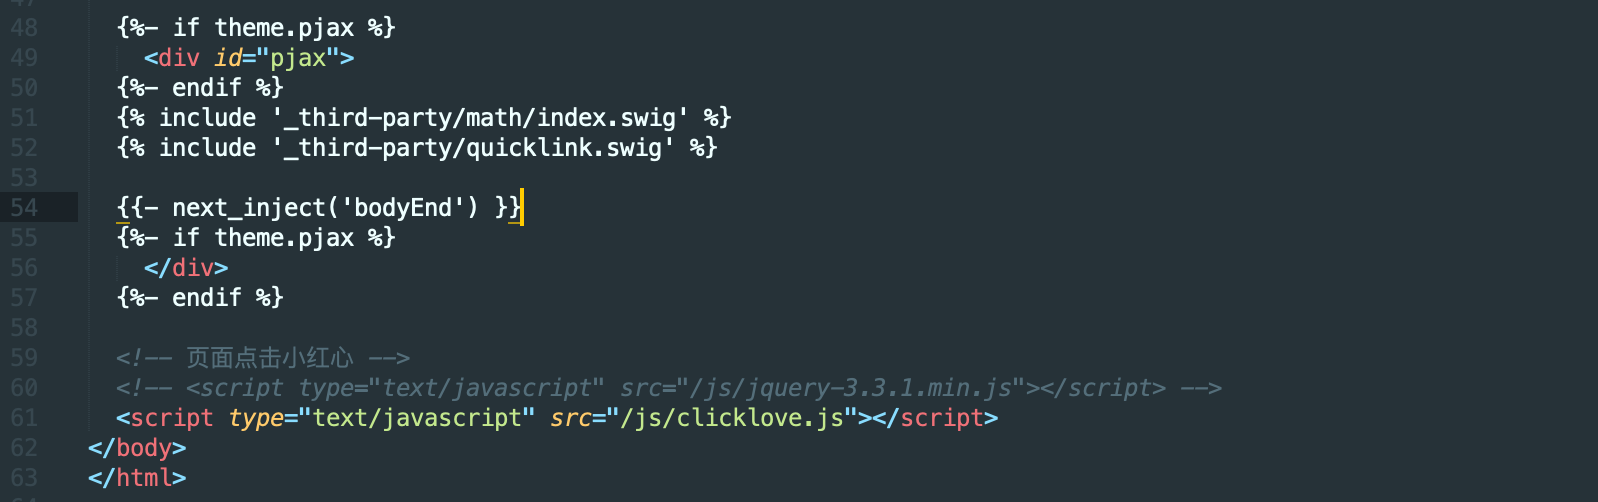
然后修改 */themes/next/layout/_layout.swig*,在末尾 body 中添加:
1 | <!-- 页面点击小红心 --> |
修改字体大小
reference: https://theme-next.iissnan.com/faqs.html#custom-font
在 next 主题配置文件 *_config.yml* 中启用 variables.styl:
1 | # Define custom file paths. |
在站点目录下的 *source/_data/* 文件夹下新建 variables.styl,填写如下内容:
1 | // 标题,修改成你期望的字体族 |
侧边栏社交链接设置
Ref:
评论系统-Valine
Ref:
评论邮件通知-Valine-Admin
Valine Admin 是 Valine 评论系统的扩展和增强,主要实现评论邮件通知、评论管理、垃圾评论过滤等功能。支持完全自定义的邮件通知模板。基于Akismet API实现准确的垃圾评论过滤。此外,使用云函数等技术解决了免费版云引擎休眠问题,支持云引擎自动唤醒,漏发邮件自动补发。兼容云淡风轻及Deserts维护的多版本Valine。
增加了 server酱 微信提醒:Valine-Admin-Server
配置变量参考:https://www.antmoe.com/posts/2380732b/
新版的 server酱 推荐使用企业微信应用来推送消息,可以参考:
https://shimo.im/docs/38dpjtwWtRRVQ6Wy/read
文章结语
Ref:
数学公式
Ref:
办法就是替换Hexo的渲染器,比如在博客目录下执行:
1 | npm un hexo-renderer-marked --save |
hexo-renderer-kramed 渲染器也有缺点,它不支持行内 latex
公式。解决办法是有的,要么在行内自己加上转义符号,要么修改渲染规则。渲染器作者建议是用`把公式标注成代码块,参见此处。
hexo-renderer-pandoc 支持行内数学公式,不用转义。
行内数学公式(样式):
1 | `$f(x) = x^{2/3}+e/3*(\pi-x^2)^{1/2}*sin(a*\pi*x)$` |
行内数学公式(测试):$f(x) = x^{2/3}+e/3*(\pi-x^2)^{1/2}*sin(a*\pi*x)$
行间数学公式(样式):
1 | $$ |
行内数学公式(测试): \[
f(x) = x^{2/3}+e/3*(\pi-x^2)^{1/2}*sin(a*\pi*x)
\] PS: 行内数学公式使用时需要用 ` 转义。
自定义 404 页面
自定义含有小游戏的404页面
https://chennq.com/Hexo/20190922-hexo_next_404page.html
https://www.jianshu.com/p/1b819734538f
NGINX 404 配置
https://leyar.me/create-404-page/
https://zhuanlan.zhihu.com/p/269456060