0%

使用 VSCode 编写 LaTeX — Mac 篇

之前在 Mac 上写 LaTex,一直用 Sublime 编写,用 TexPad 编译,TexPad 虽然很好用,界面也很好看,然而它是付费软件,一直用着**版总觉得心里过意不去,就想着替代的方案。

LaTex 可以直接用命令编译,可以写一个脚本,把编译命令放在里面,为了之前写本科毕业论文就是这样做的,然而这样还是不太方便,太 Geek 了。

直到我把文本编辑器从 Sublime 换成 VSCode 后,发现 VSCode 真是太强大了,可以把 LaTex 编写和编译都一起做了,方法如下。

Windows 环境可以参考 使用VSCode编写LaTeX

安装 LaTex 环境

阿巴阿巴,这个省略,Windows 可以装 texlive,Mac 装 MacTex

Mac 可以用 Homebrew 安装

1
brew install --cask mactex-no-gui

安装 VSCode 上的 LaTex 插件

安装 LaTex Workshop.

LaTexWorkshop

编译配置命令

打开用户配置文件(在 VSCode 界面下按下 F1,然后键入“setjson”,点击“首选项: 打开设置(JSON)”):

settings

中括号内加入:

1
2
3
4
5
6
7
8
9
10
11
12
13
14
15
16
17
18
19
20
21
22
23
24
25
26
27
28
29
30
31
32
33
34
35
36
37
38
39
40
41
42
43
44
45
46
47
48
49
50
51
52
53
54
55
56
57
58
59
60
61
62
63
64
65
66
67
68
69
70
71
72
73
74
  // LaTeX
// 不在保存的时候自动编译
"latex-workshop.latex.autoBuild.run": "never",
// 编译工具
"latex-workshop.latex.tools": [
{
"name": "xelatex",
"command": "xelatex",
"args": [
"-synctex=1",
"-interaction=nonstopmode",
"-file-line-error",
"-pdf",
"%DOCFILE%"
]
},
{
"name": "pdflatex",
"command": "pdflatex",
"args": [
"-synctex=1",
"-interaction=nonstopmode",
"-file-line-error",
"%DOCFILE%"
]
},
{
"name": "bibtex",
"command": "bibtex",
"args": [
"%DOCFILE%"
]
}
],
// 编译命令
"latex-workshop.latex.recipes": [
{
"name": "xelatex",
"tools": [
"xelatex"
],
},
{
"name": "xelatex*2",
"tools": [
"xelatex",
"xelatex"
],
},
{
"name": "pdflatex",
"tools": [
"pdflatex"
]
},
{
"name": "xe->bib->xe->xe",
"tools": [
"xelatex",
"bibtex",
"xelatex",
"xelatex"
]
},
{
"name": "pdf->bib->pdf->pdf",
"tools": [
"pdflatex",
"bibtex",
"pdflatex",
"pdflatex"
]
}
],

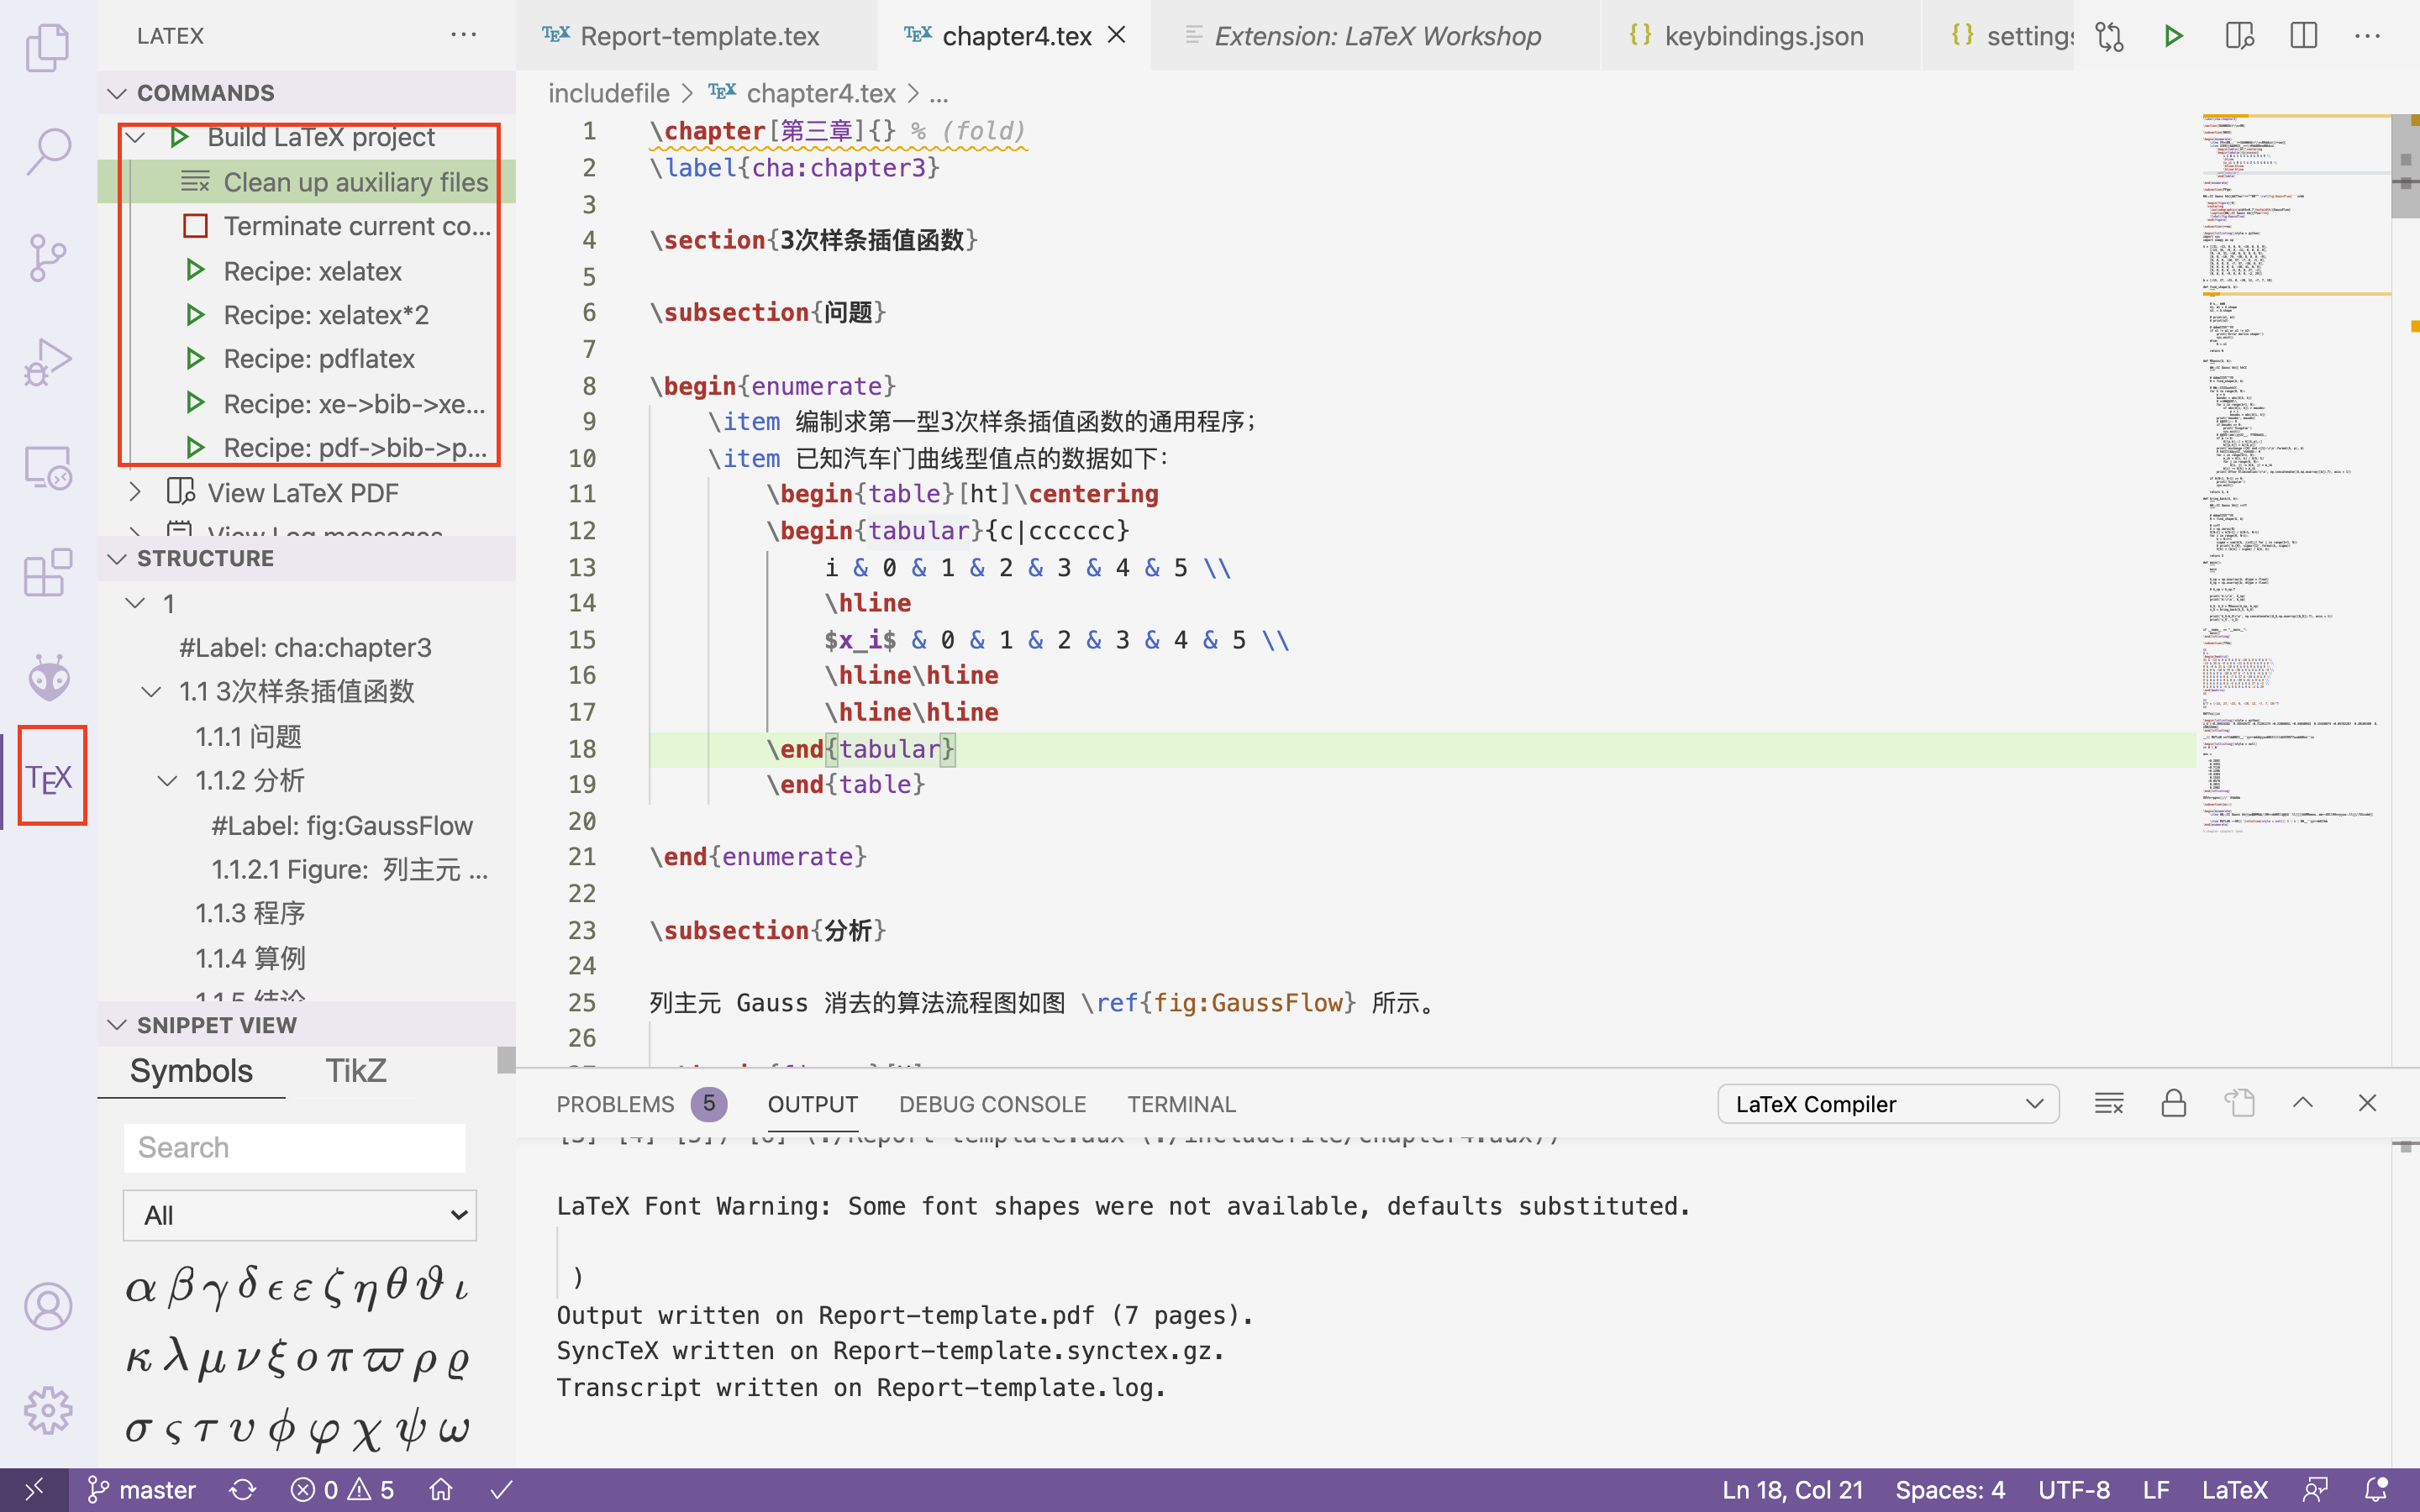
latex-workshop.latex.tools 下面的是编译工具,latex-workshop.latex.recipes 下面的是编译命令,可以根据需要自行修改,其中第一个 recipes 是 默认的编译命令。

然后就可以进行编译了:

compile

配置快捷键

打开 keybindings.json 文件(在 VSCode 界面下按下 F1,然后键入“keyboard”,点击“Preference: Open Keyboard Shortcuts(JSON)”):

keyboard

在中括号内加入:

1
2
3
4
5
6
7
8
9
10
11
12
13
14
15
16
17
18
19
20
21
22
23
{
// 前向搜索
"key": "alt+s",
"command": "latex-workshop.synctex",
"when": "editorTextFocus"
},
{
// 使用默认 recipe 编译
"key": "alt+b",
"command": "latex-workshop.build",
"when": "editorTextFocus"
},
{
// 终止编译
"key": "alt+t",
"command": "latex-workshop.kill",
"when": "editorTextFocus"
},
{
// 选择其他 recipe 编译
"key": "alt+e",
"command": "latex-workshop.recipes"
},

这段的意义是将 Alt+s 绑定到正向搜索,将 Alt+b 绑定到使用默认 recipe 编译,将 Alt+t 绑定到终止编译,将 Alt+e 绑定到选择其他 recipe 编译,可以自行更换为适合自己的快捷键,只需修改“key”那一项即可。

配合 Skim 正向搜索和逆向搜索

安装 Skim

Mac 上安装 Skim,可以去 sourceforge.net 下载,或者使用 brew 安装:

1
brew cask install skim

VSCode 配置

在用户配置文件 (settings.json) 中加入:

1
2
3
4
5
6
7
8
9
10
11
12
13
14
15
16
17
  // 使能从 VSCode跳转到 Skim 里相应位置
// external pdf viewer
"latex-workshop.view.pdf.viewer": "external",
"latex-workshop.view.pdf.external.synctex.command": "/usr/local/bin/displayline",
"latex-workshop.view.pdf.external.synctex.args": [
"-r",
"%LINE%",
"%PDF%",
"%TEX%"
],

// 使能从 VSCode 中直接打开 Skim
"latex-workshop.view.pdf.external.viewer.command": "/usr/local/bin/displayline",
"latex-workshop.view.pdf.external.viewer.args": [
"0",
"%PDF%"
],

Skim 配置

skim-选项-同步-预设vscode:

skim

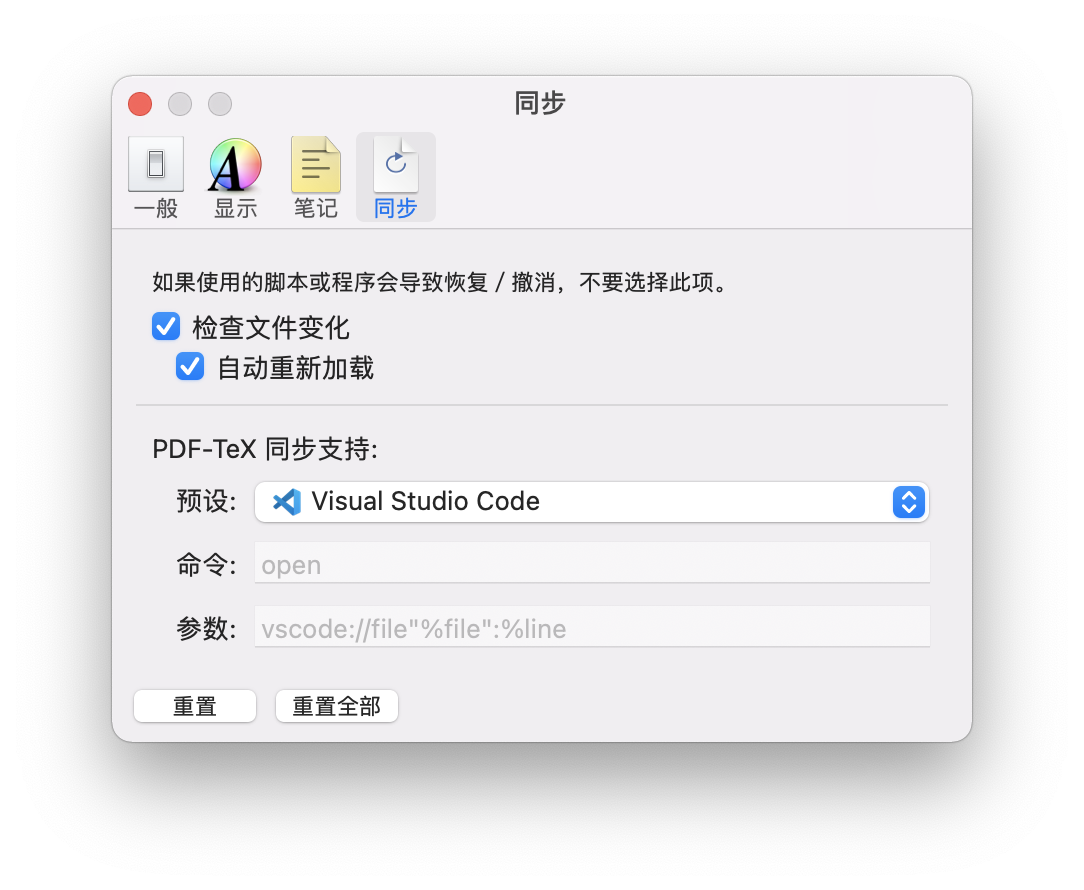
然后从 VSCode 跳转到 Skim 使用快捷键 alt+s,Skim 中 PDF 对应的位置会显示一个红点,从 Skim 跳转到 VSCode 使用 command+shift+鼠标左击

Reference

[1] Mac上使用VSCode编辑Latex+Skim跳转预览

[2] 使用VSCode编写LaTeX

[3] 在 macOS 上配置 VSCode 与 Skim 的 LaTeX 正反跳转

-------The end of this article  Thank you for your reading-------